Connecting to Linux Instances from Windows
Note
This guide assumes you associated your SSH Key Pair with the instance when it was created, and that you are connected to the Anvil VPN.
If do not already have the PuTTY package installed, download and install the PuTTY package (64-bit x86 .msi installer) from this link. Once installed, start PuTTY.
Login into the web dashboard at https://anvil-beta.unl.edu/. From the left-hand side menu, choose Instances.
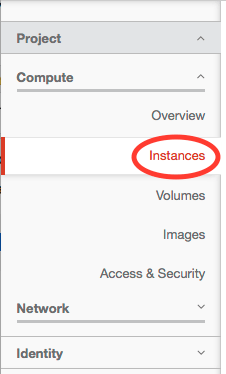
This will show a table with the running instances and a few details about them. Take note of the IP address entry; this is the address that will be used to connect.

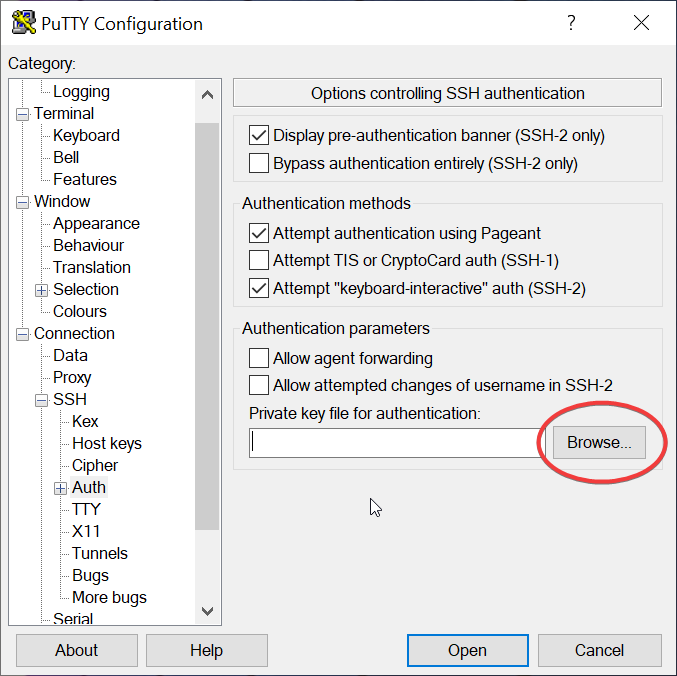
In this example, the private key file is assumed to be
named anvil_key.ppk and saved on the desktop. In PuTTY window, click
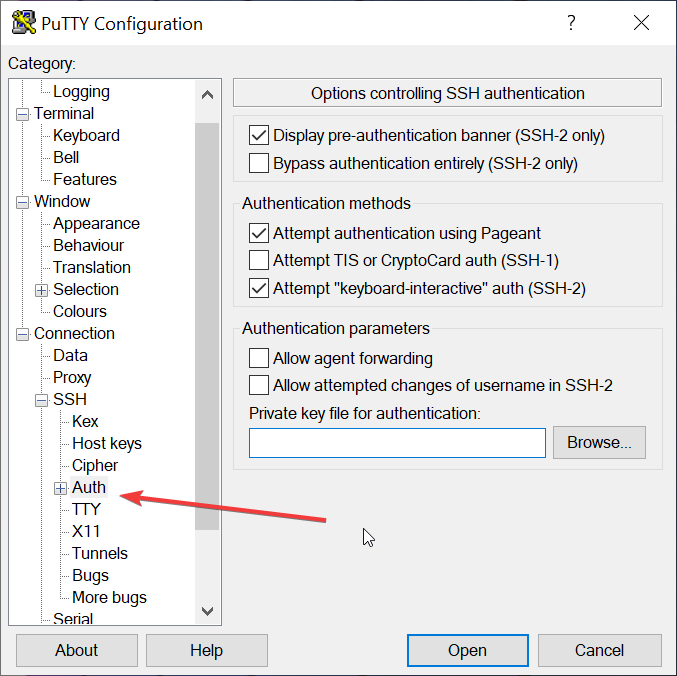
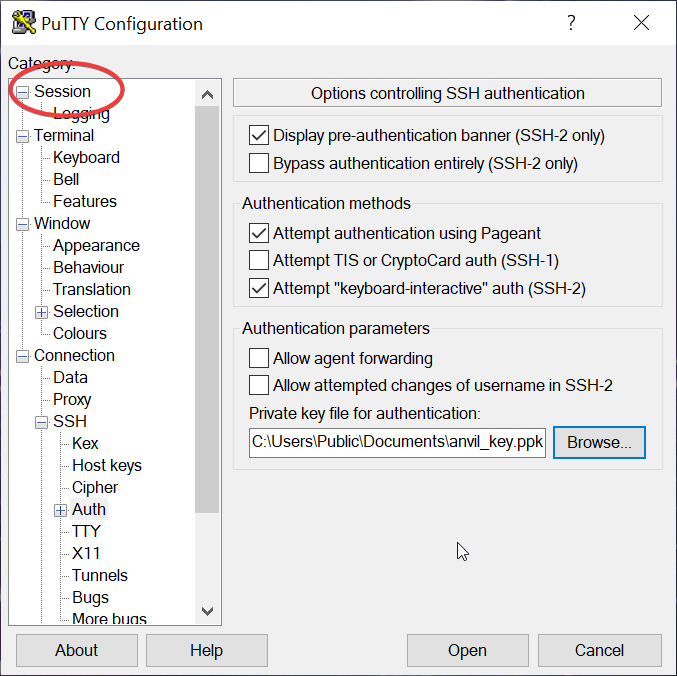
the '+' icon next to SSH under Connection to expand the menu.

Next, click the Auth menu item.
Note
Since PuTTY version 0.78, the Private key file for authentication field has been moved under Auth -> Credentials, so please select this to upload the key when using PuTTY version 0.78 and above.
Click the Browse button and the select the anvil_key.ppkfile.
With the private key selected, click the Session menu option at the top to return to the original PuTTY window.
Fill in the Host Name (or IP address) field with the IP address of you instance. Choose a name to save the settings for your instance with and enter it in the Saved Sessions field.

Click the Save button to save everything.
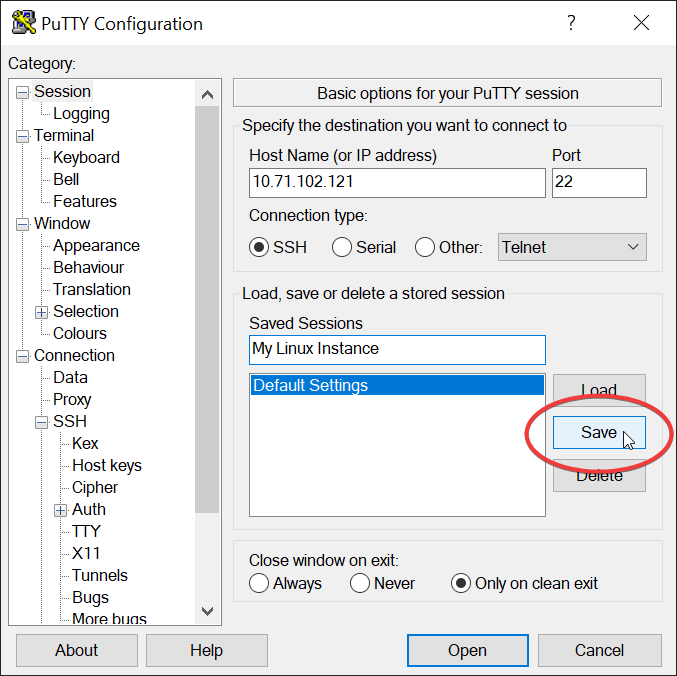
Next, click Open to connect to your instance.

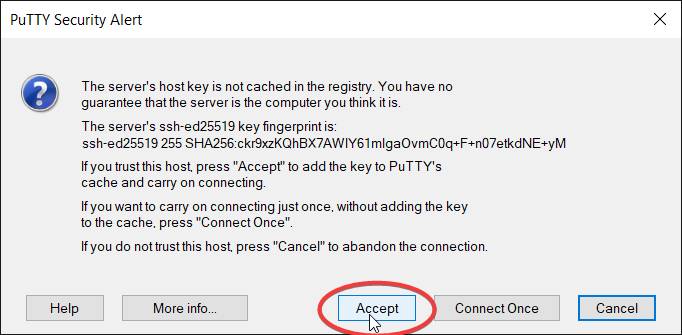
Since this is the first time connecting to the instance, a warning box will appear. Click Accept to continue and save the instance's key. This warning box will not appear on subsequent connections.
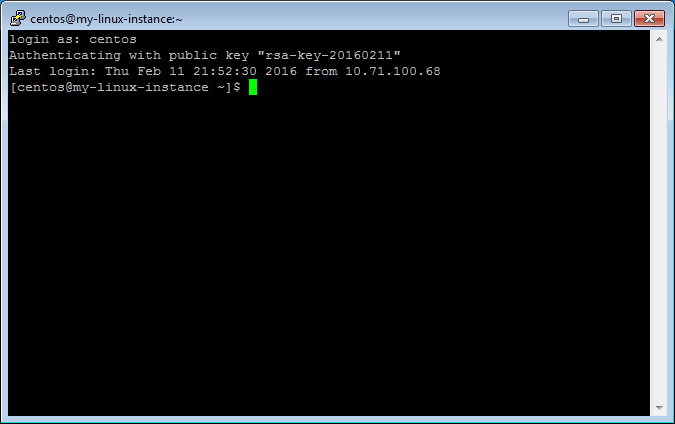
You should then see a terminal window prompting for a username.
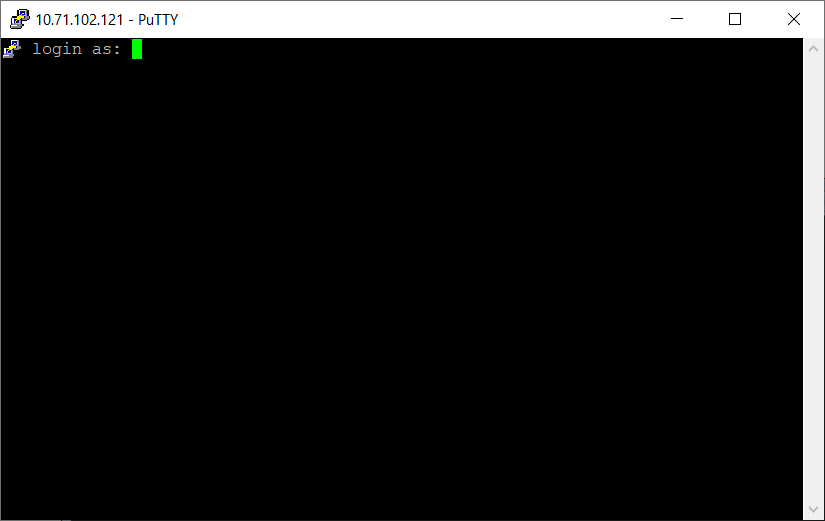
Depending on which Linux OS you're using for your instance, the
username will be different. See the
Available Images
page for a table with the username corresponding to each OS. The
example instance here is CentOS, so the username is centos. Enter
the appropriate username and hit Enter. You should then be logged in.