Using MySQL instances
Note
This guide assumes you associated your SSH Key Pair with the instance when it was created, and that you are connected to the Anvil VPN.
The MySQL images HCC provides are CentOS 7 based with MySQL/MariaDB installed
and configured to allow remote access for a MySQL user named root.
Access to MySQL is provided via this root user and a random password. When
the instance is created, the password is set randomly using your
SSH Key Pair. This password can be retrieved via the Dashboard web
interface, and is then used to login to MySQL.
Note
The root user is for connecting to MySQL only. Access via SSH is the same
as other CentOS-based images, using the centos user and SSH keys. Refer to
the instructions for Windows
or Mac as needed.
This guide assumes you have already created an instance using the MariaDB Server image.
In order to access the database, two additional steps are required. A
Security Group must be created in OpenStack to allow access to the MySQL port (3306),
and the randomly generated password must be recovered.
Create and attach a security group
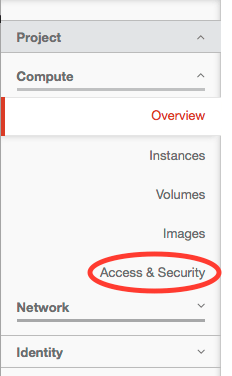
Log into the Anvil web dashboard at anvil.unl.edu using your HCC credentials. On the left-hand side navigation menu, click Access & Security.
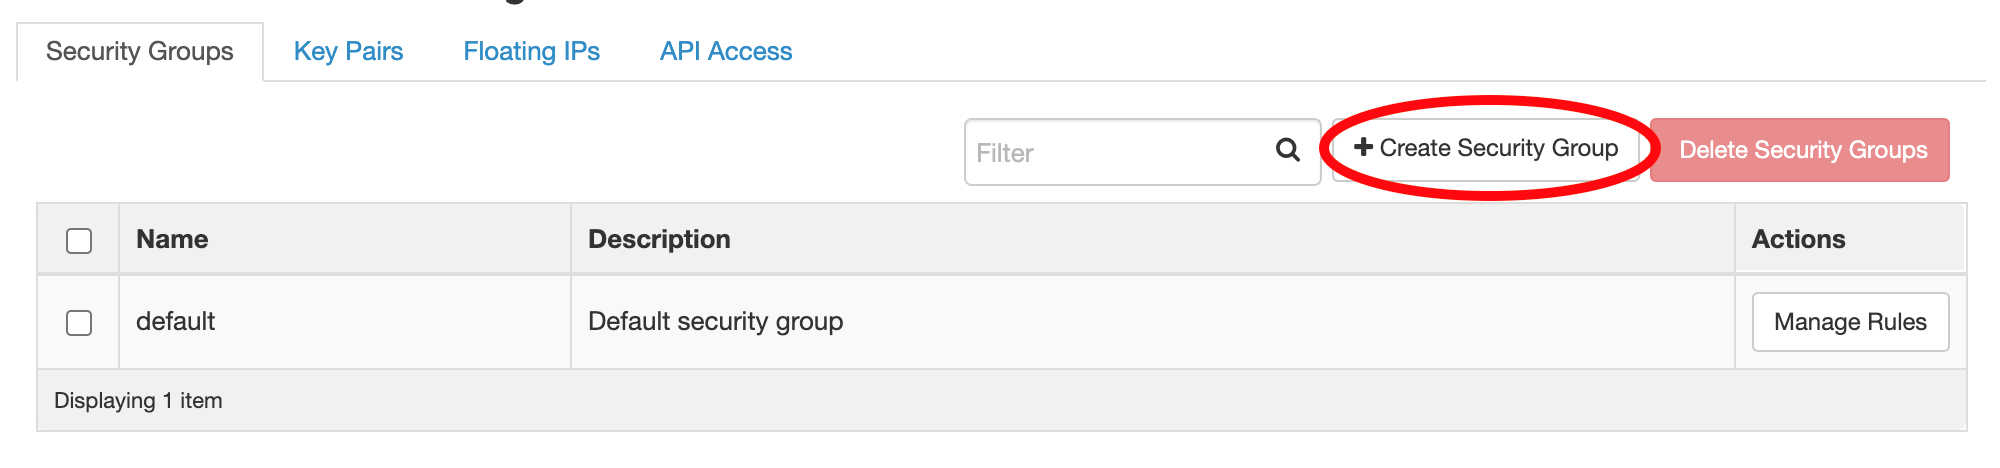
The Security Groups tab should already be selected. Click the Create Security Group button in the upper right.
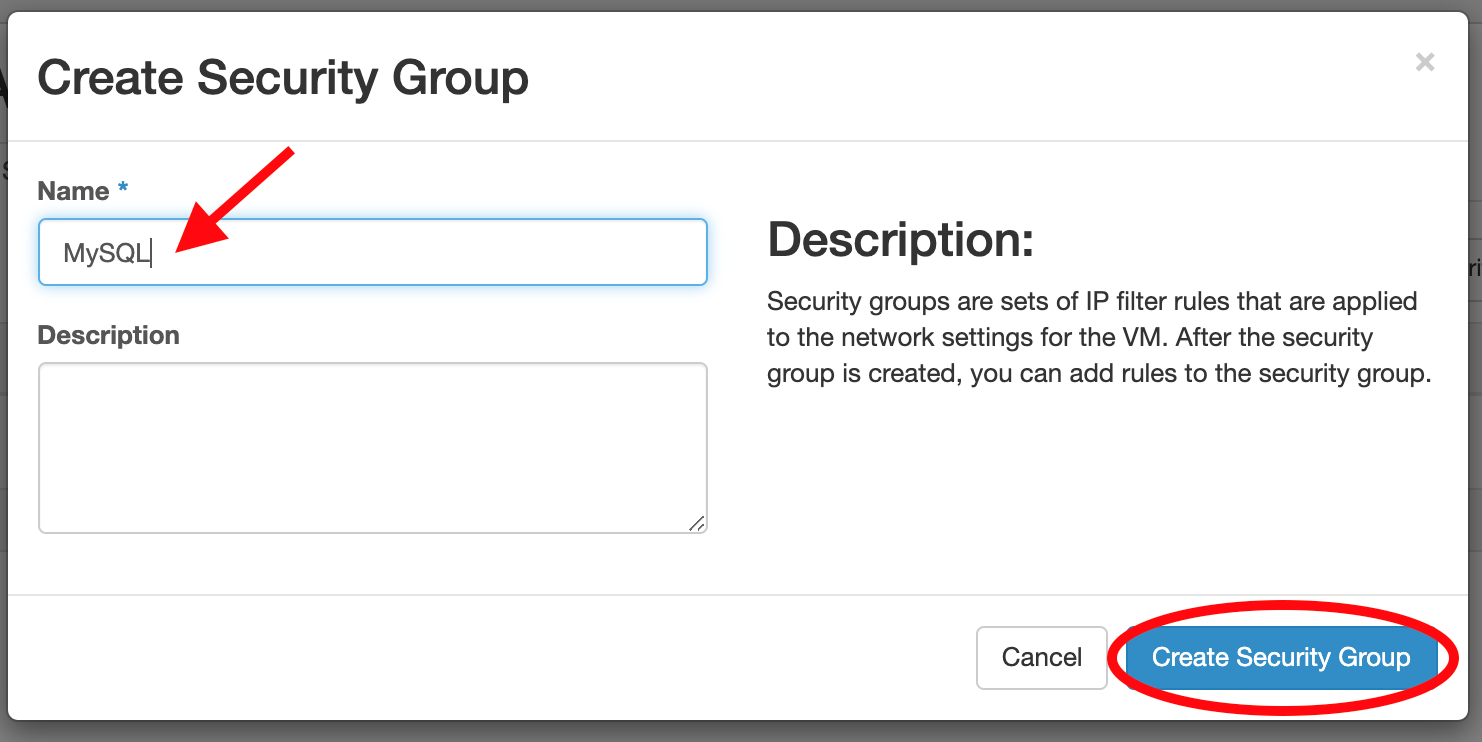
A new window will open. Type in "MySQL" for the Name and then click Create Security Group to save and close the window.
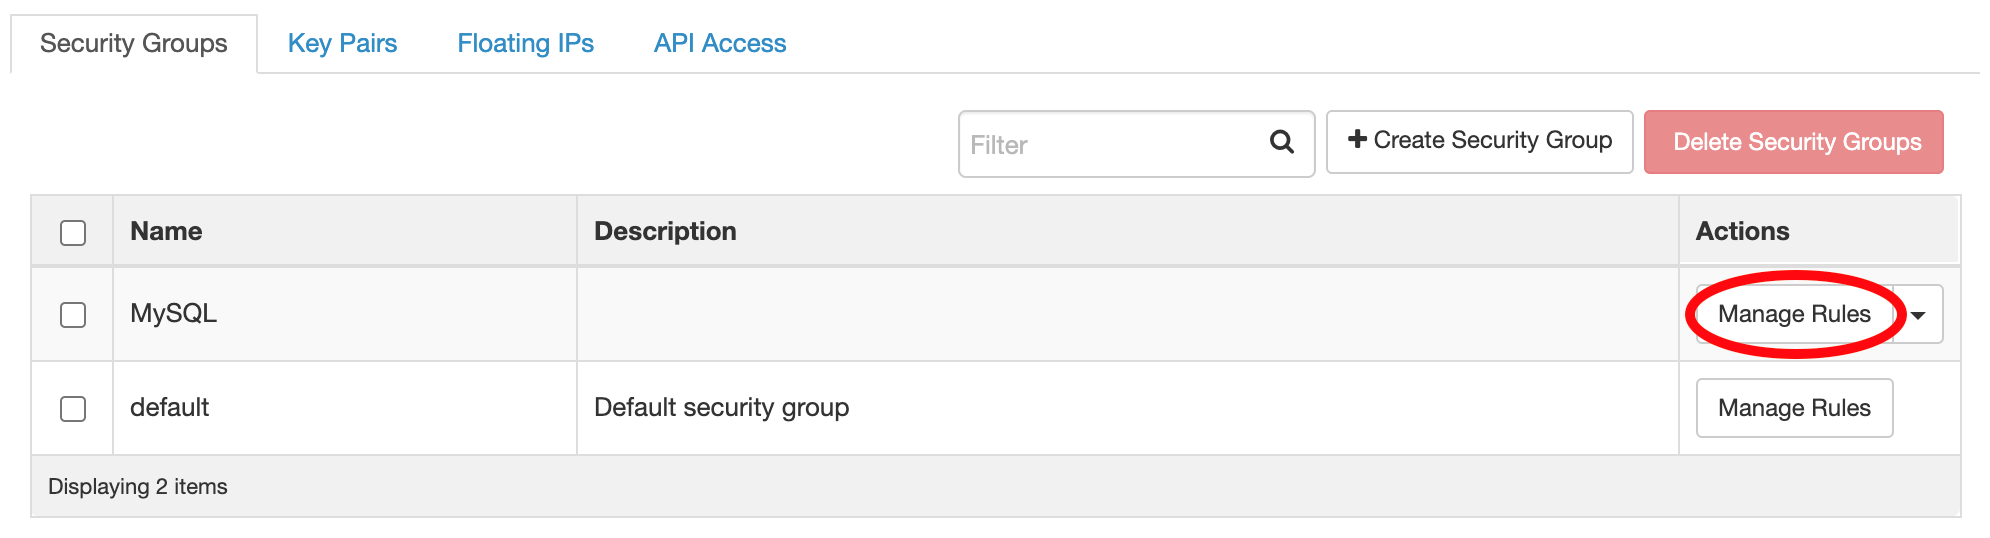
Next, click Manage Rules for the newly created MySQL group.
The details page for the group will open. Click the Add Rule button in the upper right.
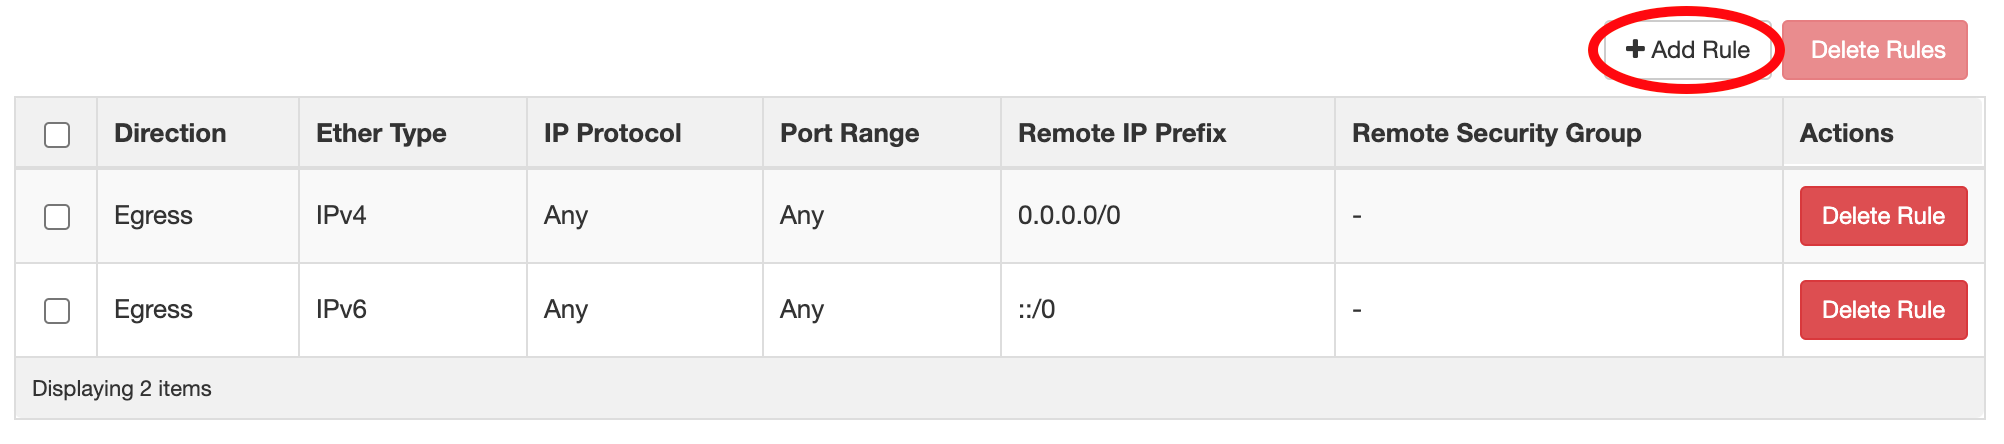
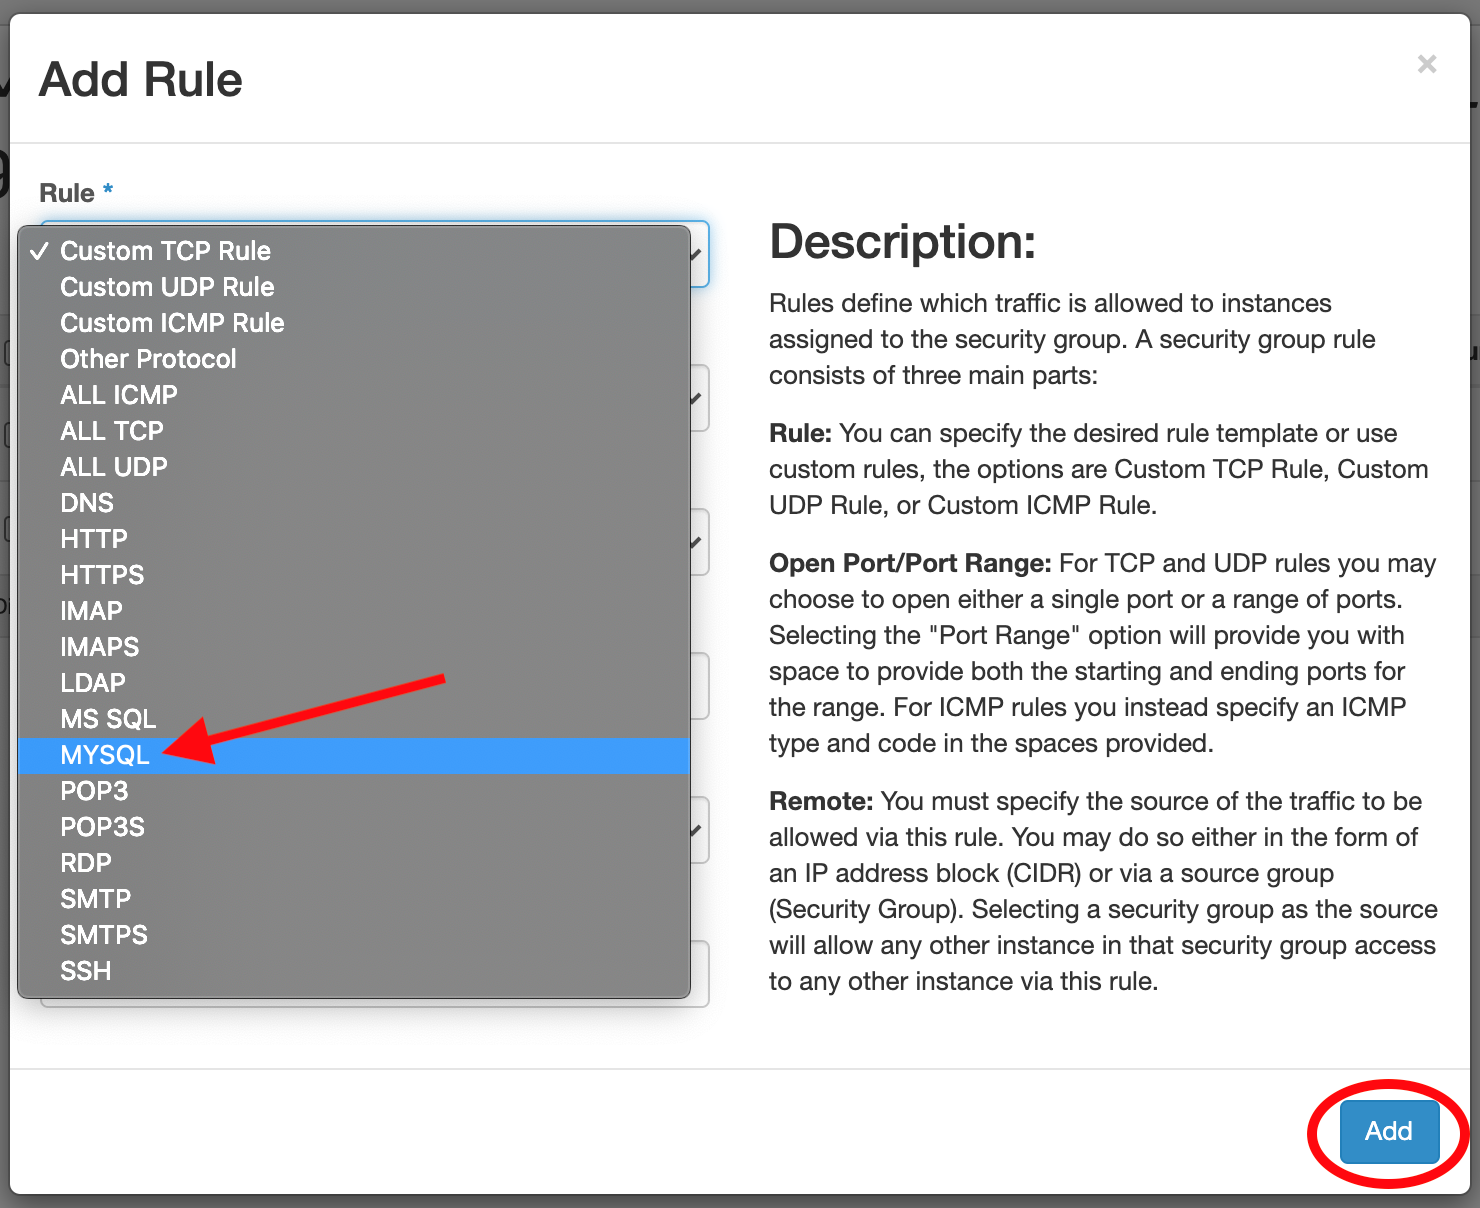
In the new window, open the Rule drop-down menu and select MYSQL. Click Add to finalize the selection and close the window.
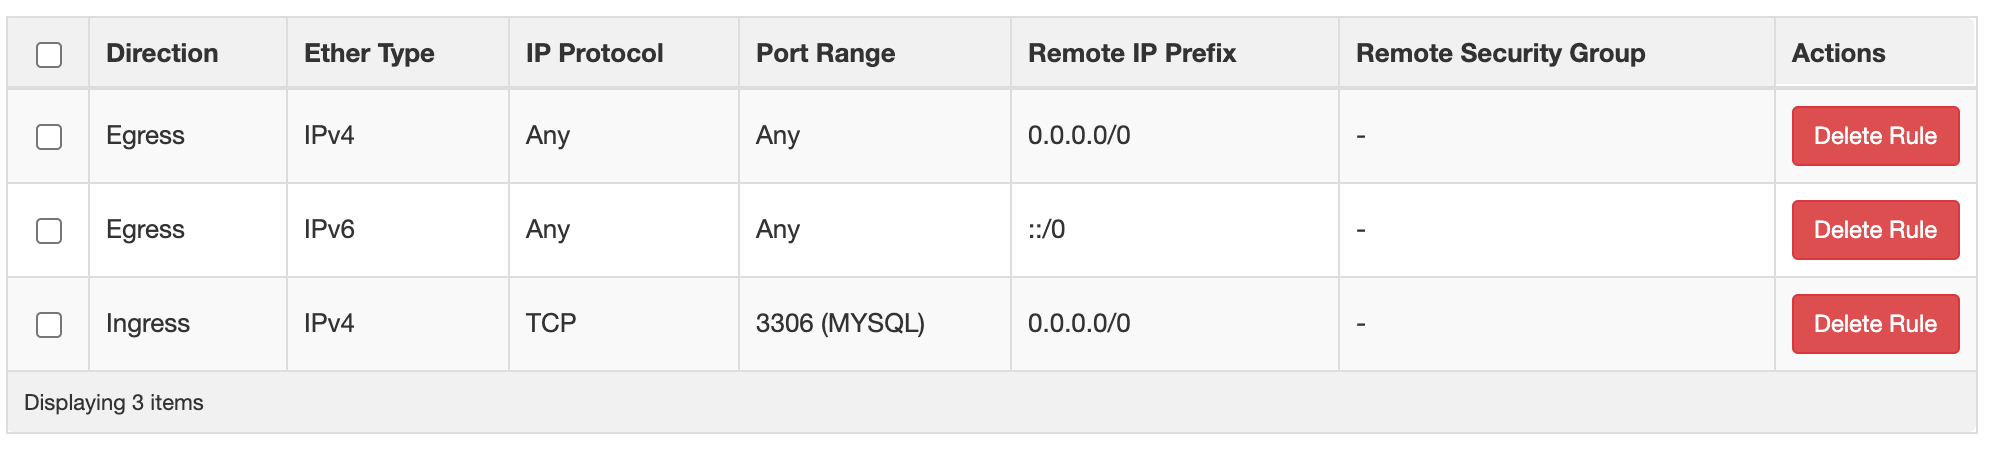
You should now be returned to the details page for the security group. Verify that the MYSQL rule is listed.
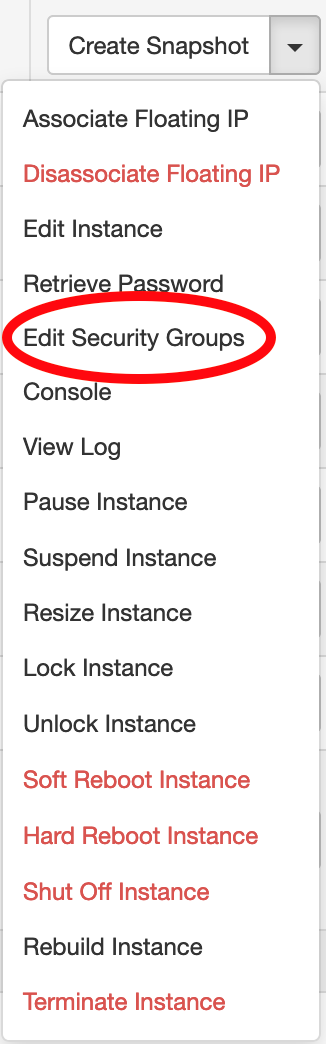
Click the Instances button on the left, and locate your MySQL Server instance in the list. Open the drop-down menu on the far right, and choose Edit Security Groups.
A new window will open with the available security groups on the left, and the active ones
for the instance on the right. Click the + sign next to the MySQL group to add it to
your instance.
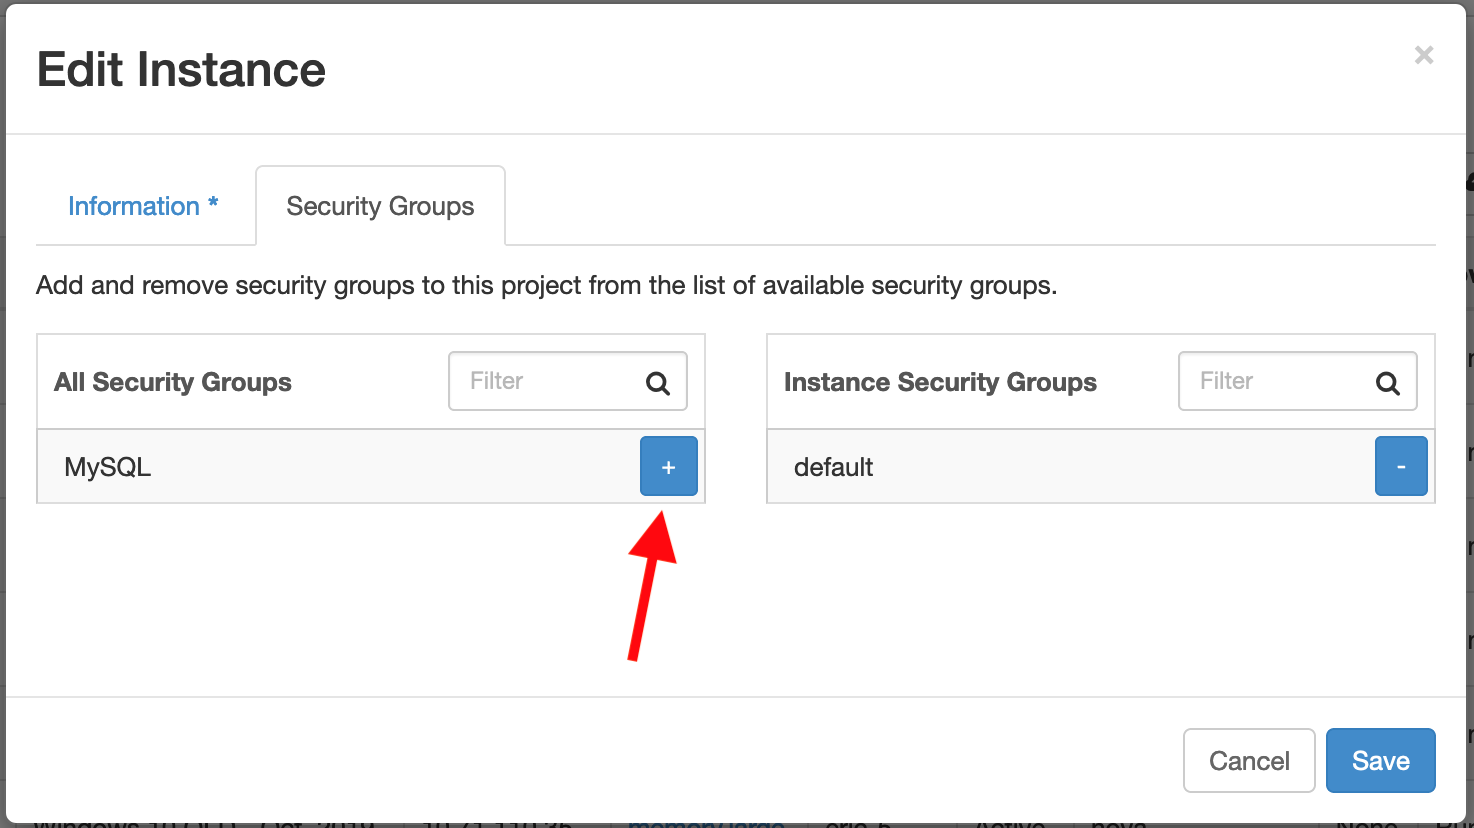
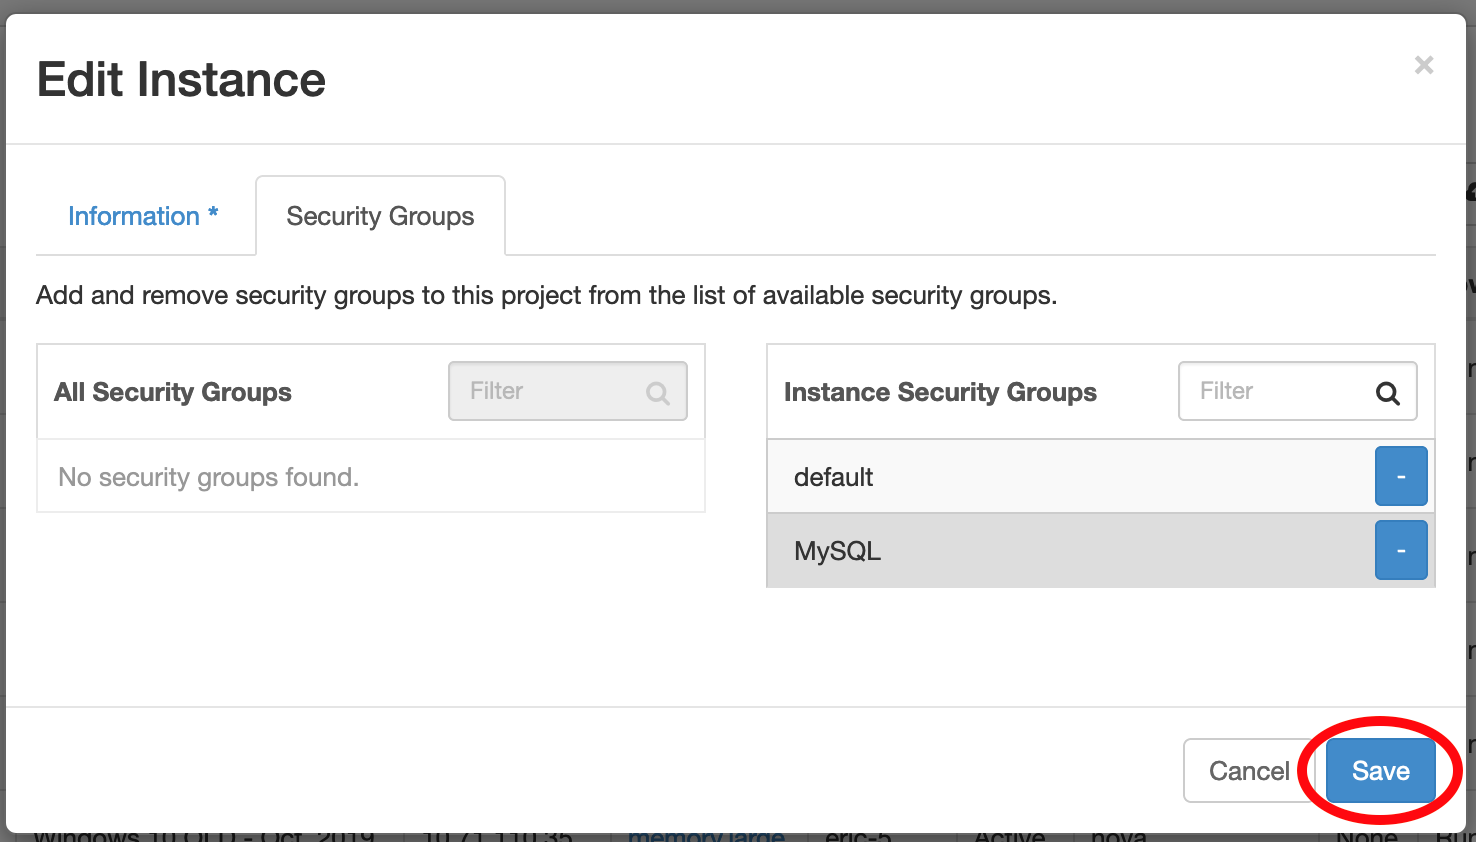
It will move from the left side to the right. Now click Save to apply the changes and close the window.
You can now connect to the MySQL server in your instance.
Recover the MySQL password
Once your instance is running, login to the Anvil web dashboard at anvil.unl.edu and click the Instances menu option on left-hand side. You should see an entry for your instance similar to the following:

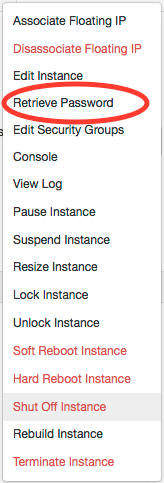
Click the down arrow next to Create Snapshot to open the drop-down menu and select Retrieve Password:
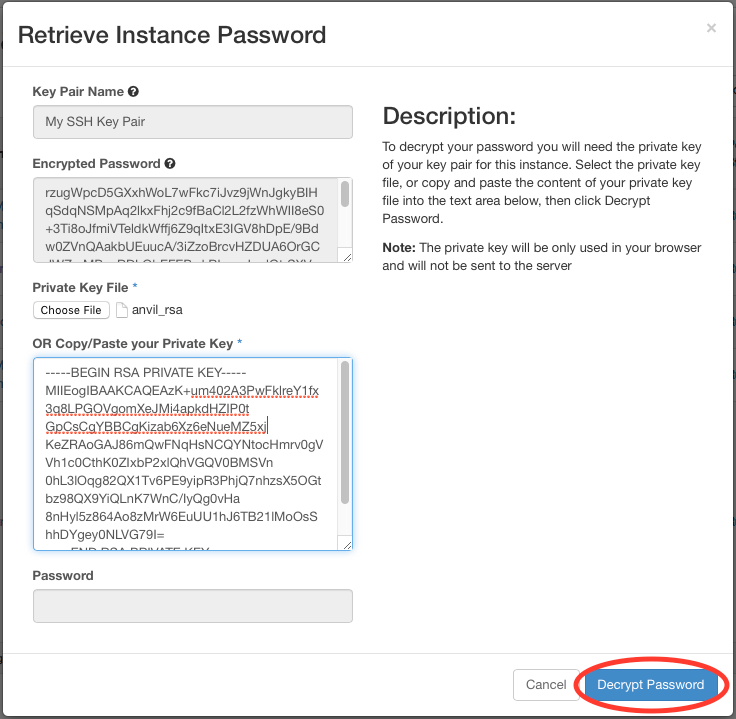
This will open a new pop-up window where you will need to select your private SSH key file. Click the Choose File button to open a file explorer window.
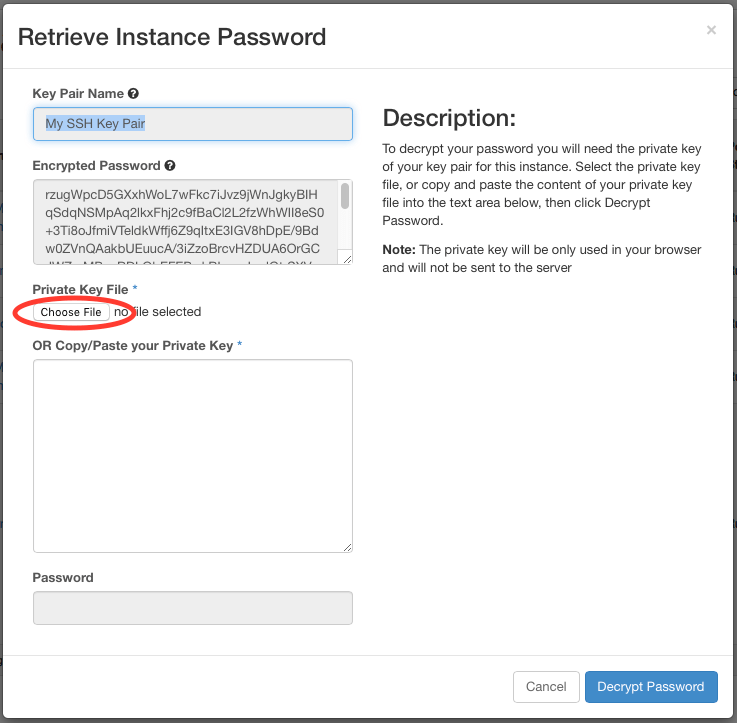
Navigate to your private key file and choose to open the file. The large text box should now have the contents of your private key. Click the Decrypt Password button:
The randomly generated password should appear in the Password field.
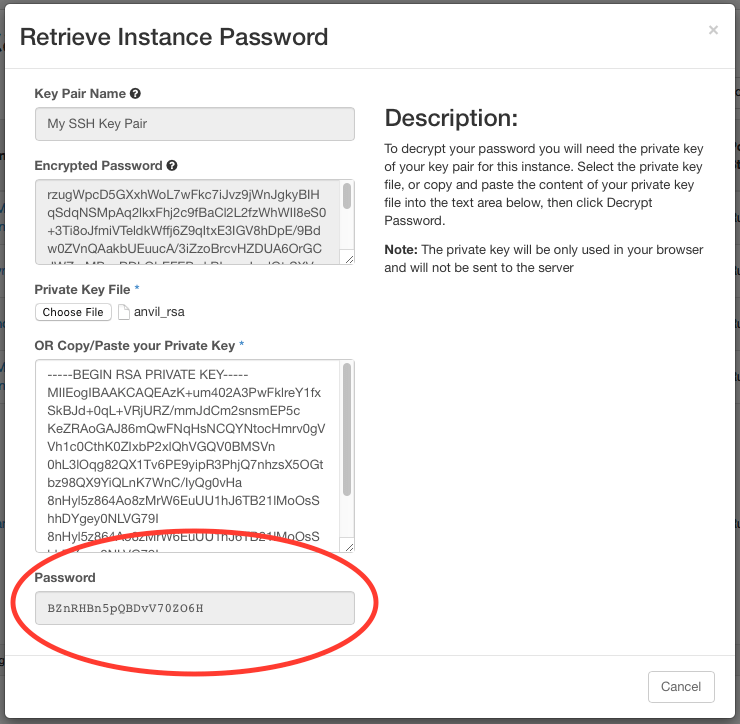
Copy and paste this password into a convenient text editor.
Connecting to MySQL
Determine the IP address of your instance by looking at the fourth column entry on the Instances page:

Using the username root along with the recovered password and the IP
address, you can now connect to MySQL using the program of your choice.
By default, MySQL runs on port 3306.
For example, using the command line client:
[demo20@login ~]$ mysql -u root -h 10.71.104.142 -p
Enter password:
Welcome to the MySQL monitor.  Commands end with ; or \g.
Your MySQL connection id is 6
Server version: 5.5.65-MariaDB MariaDB Server

Copyright (c) 2000, 2013, Oracle and/or its affiliates. All rights reserved.

Oracle is a registered trademark of Oracle Corporation and/or its
affiliates. Other names may be trademarks of their respective
owners.

Type 'help;' or '\h' for help. Type '\c' to clear the current input statement.

mysql>
Using a volume to store the database
By default, the database is stored on the instance's virtual disk. The amount of space available may not be sufficient for larger databases, so a Volume may be used instead.
All of the following setup commands need to be run as root in the instance after
connecting via SSH from either Windows
or Mac.
Running commands as root
In order to use a volume, first follow the instructions to
create and attach a volume to your
instance MySQL instance. Next, proceed with formatting and mounting the volume
in your instance. If all the steps complete without errors, you should have your volume mounted at /mnt/myvolume.
Next, the MySQL server needs to be stopped and the existing contents of its storage directory copied to the volume:
service mysql stop
rsync -av /var/lib/mysql/ /mnt/myvolume/
Now the volume can be unmounted from /mnt/myvolume and remounted over the existing /var/lib/mysql location:
umount /mnt/myvolume
mount /dev/vdb1 /var/lib/mysql
Running the df -h command should show the /var/lib/mysql location as mounted from /dev/vdb1 with the
increased storage amount:
/dev/vdb1 99G 183M 94G 1% /var/lib/mysql
In this example the volume size is 100GB. In general, it should be approximately the same size as your volume.
Finally, restart the MySQL server:
service mysql start
Assuming the service command doesn't return an error, the increased space is now available for use.
The last step is to ensure the volume gets mounted automatically after the instance is rebooted. To
enable this, add the following line to the /etc/fstab file:
/dev/vdb1 /var/lib/mysql ext4 defaults 0 0