Resizing an instance
It is possible to resize an existing instance. To do so, please follow the steps below.
Note
An instance can only be resized to a flavor with a disk size equal or larger to the existing one. To use a flavor with a smaller disk size, you will need to create a new instance.
To resize an instance:
-
The resize procedure requires that your instance be shutdown and rebooted. Ensure that your instance is ready to be shutdown. If necessary, connect to your instance and stop any running processes.
-
Login to the Anvil Dashboard at https://anvil.unl.edu with your HCC credentials.
-
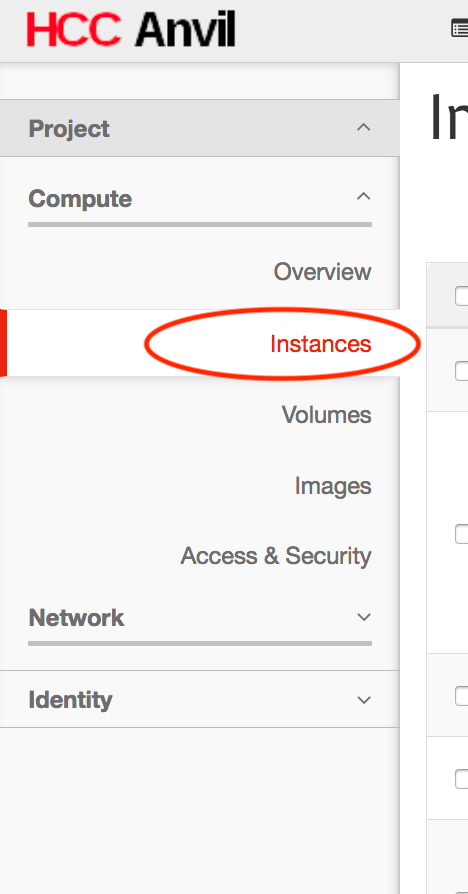
Click Instances in the menu on the left and locate your instance.
-
If you have important data in your instance and want to protect against possible data loss, take a snapshot of the image.
-
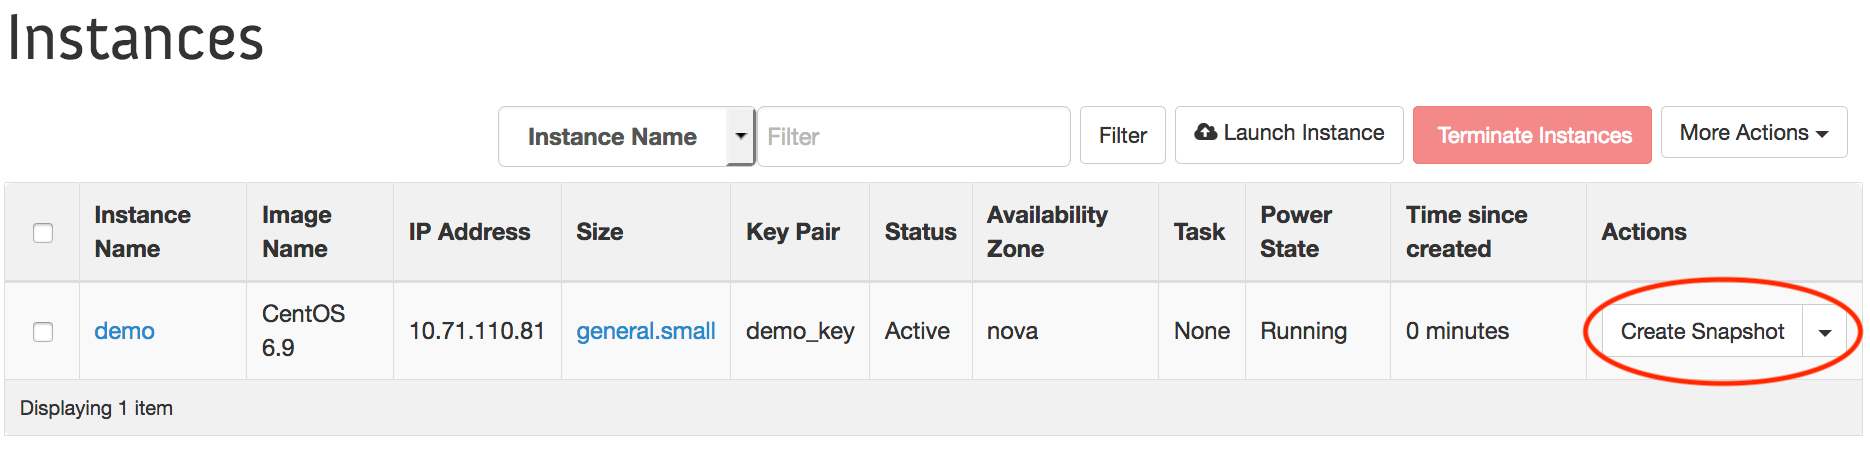
To take a snapshot, clicking the Create Snapshot button on the right hand side of your image in the list.
-
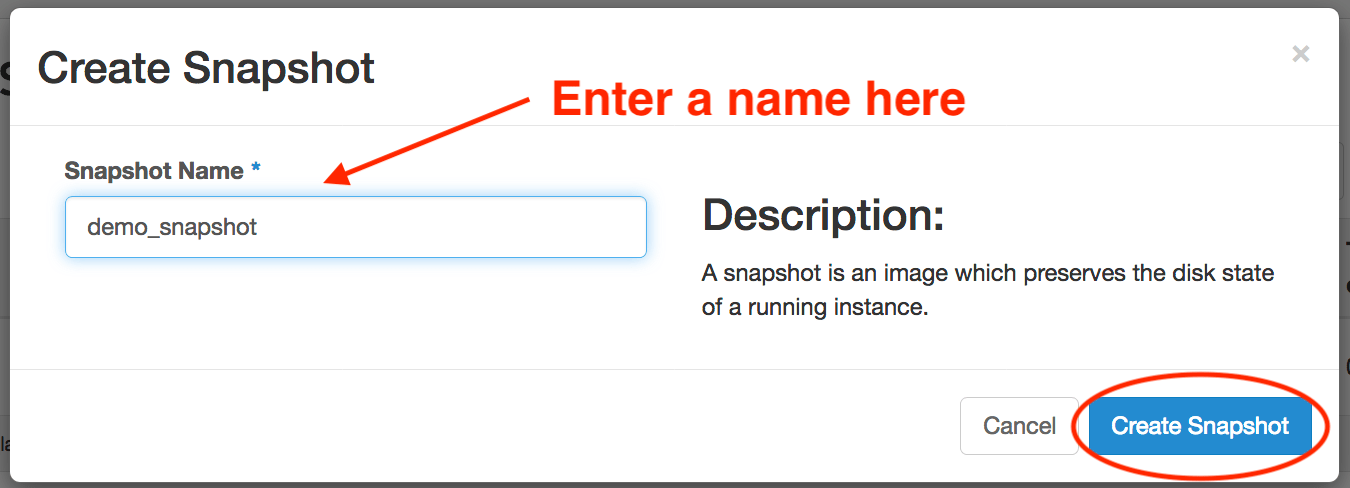
Enter an identifiable name for your snapshot and click Create Snapshot.
-
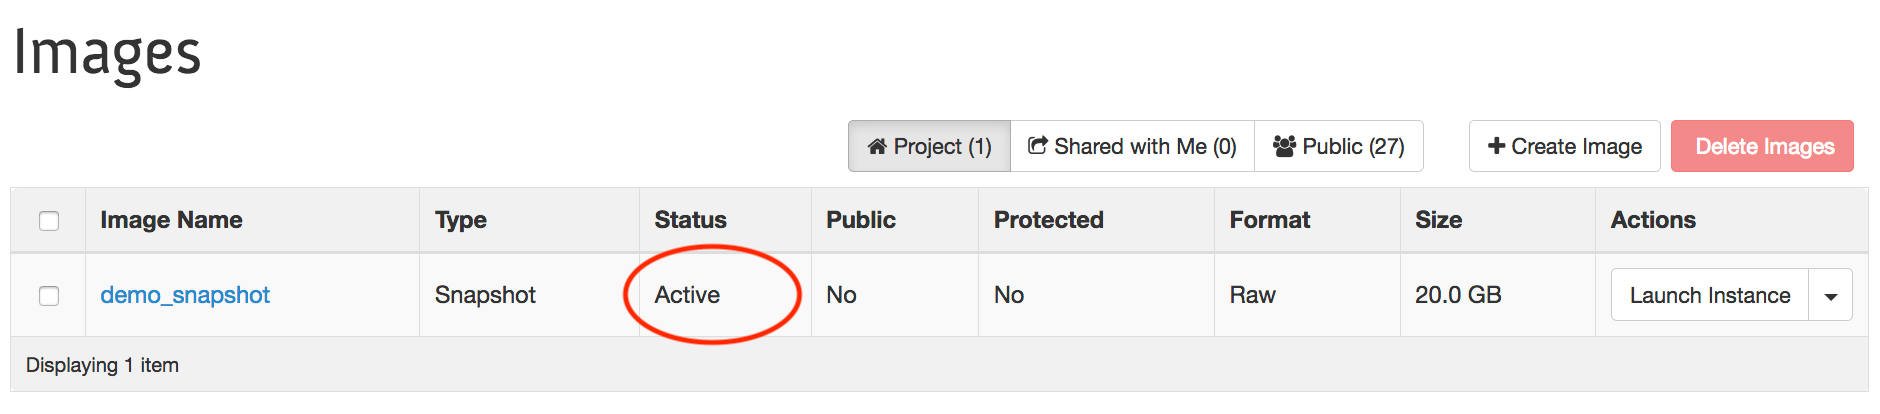
You will be taken to the Images page, where your snapshot will be Queued. Wait until the image has finished saving, as indicated by the Status changing to Active
-
Return to the Instance list by clicking Instances in the left hand menu.
-
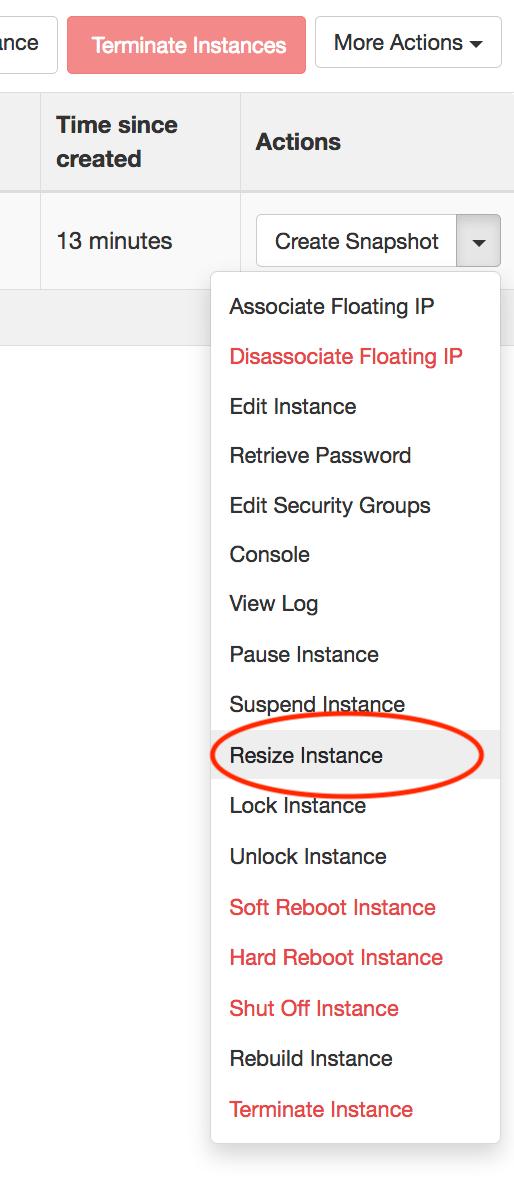
-
Click the down arrow next to the Create Snapshot button and click Resize Instance in the menu.
-
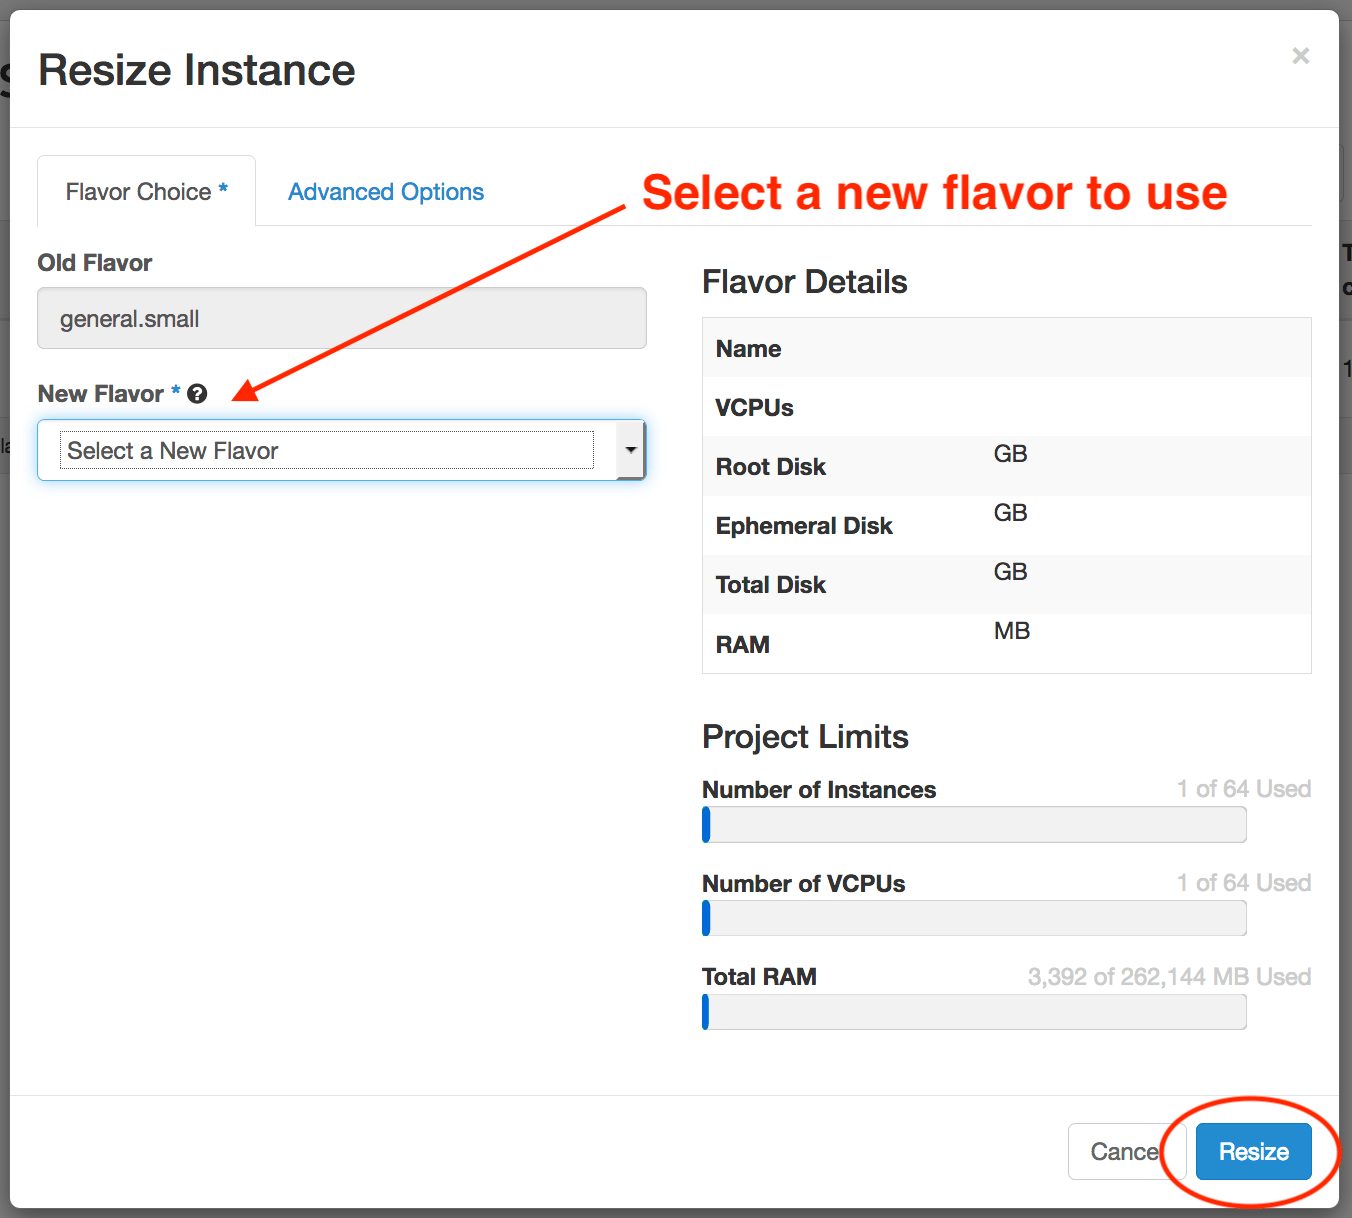
Select the desired New Flavor and click the Resize button.
-
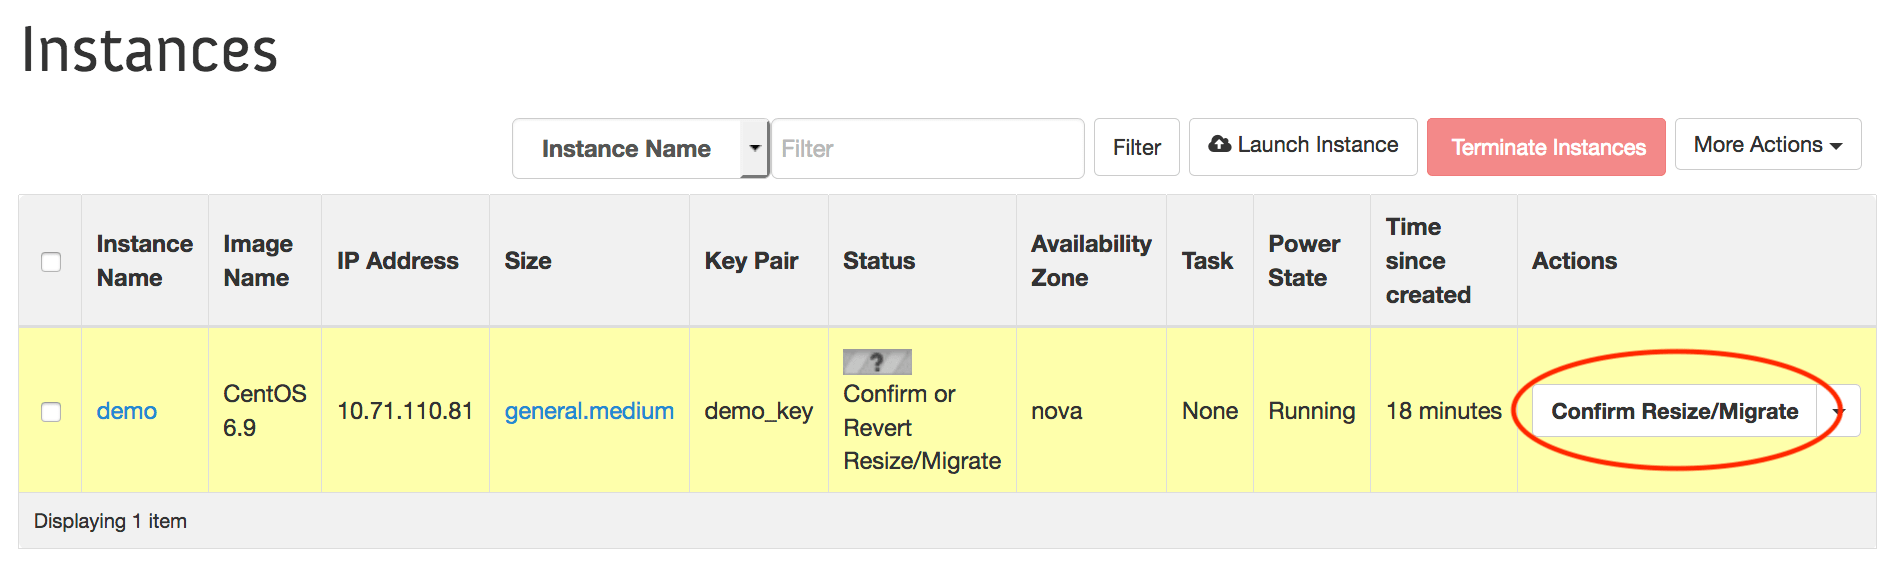
Wait until the instance is resized as indicated by the status "Confirm or Revert Resize/Migrate". Click the Confirm Resize/Migrate button to finalize the resize.
At this point, your instance should have a status of Active. Connect to your instance and ensure that everything works as expected.
Warning
If your instance ends in an "Error" state or you have any issues or questions with resizing, please contact us at hcc-support@unl.edu for assistance.