File Transfers Between Collections
To transfer files between HCC clusters, you will first need to
activate the
two collections you would like to use (the available collections
are: hcc#swan, and hcc#attic). Once
that has been completed, follow the steps below to begin transferring
files. (Note: You can also transfer files between an HCC collection and
any other Globus collection for which you have authorized access. That
may include a personal
collection,
a shared
collection,
or a collection on another computing resource or cluster. Once the
collections have been activated, the file transfer process is generally
the same regardless of the type of collections you use. For demonstration
purposes we use two HCC collections.)
-
Once both collections for the desired file transfer have been activated, sign in to your Globus account (if you are not already) and select the File Manager tab from the left sidebar, and then select Transfer or Sync to... from the right sidebar. If you have a small screen, you may have to click the menu icon first.

-
In the two "Collection" text boxes, enter the names of the two collections you would like to use (for example,
hcc#atticandhcc#swan). Alternatively, you can select from one of your recently used, bookmarked, owned, or shared collections that are pulled up when you click on the text box to enter your search. Enter the directory paths for both the source and destination (the 'from' and 'to' paths on the respective collections). Press 'Enter' to view files under these directories. Select the files or directories you would like to transfer (press shift or control to make multiple selections) and click the blue highlighted arrow to start the transfer.

-
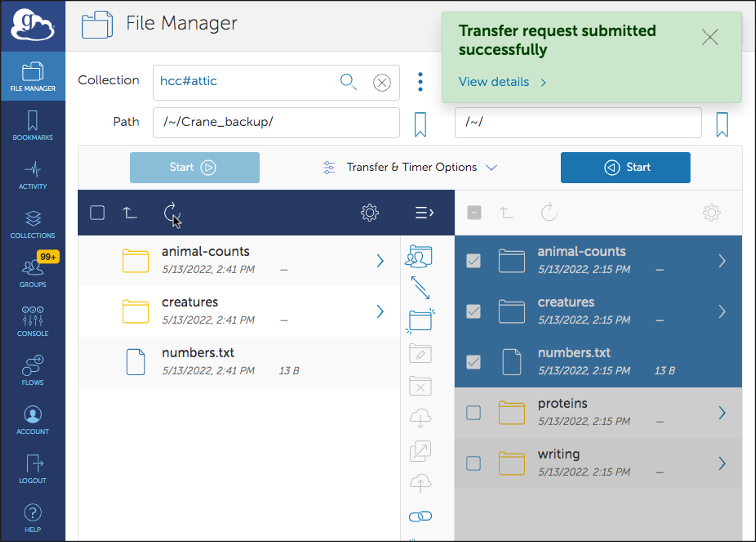
Globus will display a message that your transfer was submitted successfully, and you can click on "View details" in this message to see the status of the transfer. You will also receive an email when the transfer has completed (this is especially helpful in the case of large, long-duration transfers). Finally, to see your newly transferred file(s) in the destination folder, select the "refresh list" icon for that collection.
