Globus Command Line Interface
Globus Command Line Interface (CLI) provides an interface to Globus services from the shell and can be incorporated into scripts or used interactively. The CLI allows users to transfer files and manipulate directory structures on a remote endpoint without use of the web interface.
Note
Here, the term "Endpoint" is used instead of "Collection", but in this context they are interchangable. Although Globus has switched to using the term "collection" on the transfer portal, the cli described here still uses "endpoint".
Connecting to Globus on the Command Line
To establish a Globus connection, a user must connect their HCC account to their Globus account. To do so, follow these steps:
- Connect to the desired HCC cluster.
-
Load the Globus CLI module:
module load globus-cli -
Use the command
globus loginto start the authorization procedure. A web address will be displayed on screen. Copy and paste this URL into your browser. Note: use the URL from your terminal, not in the example.
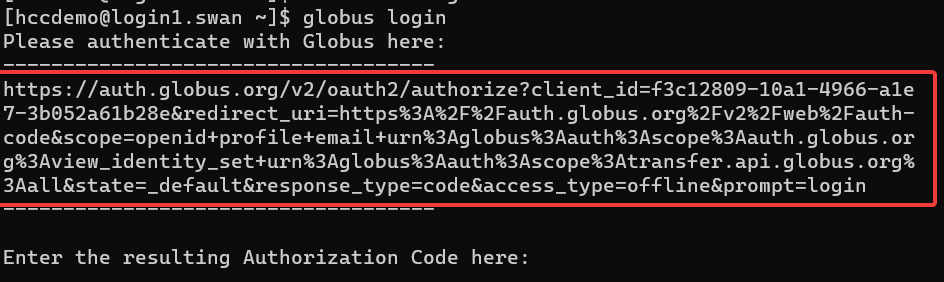
[hccdemo@login1.swan ~]$ globus login
Please authenticate with Globus here:
------------------------------------
https://auth.globus.org/v2/oauth2/authorize?client_id=f3c12809-10a1-4966-a1e7-3b052a61b28e&redirect_uri=https%3A%2F%2Fauth.globus.org%2Fv2%2Fweb%2Fauth-code&scope=openid+profile+email+urn%3Aglobus%3Aauth%3Ascope%3Aauth.globus.org%3Aview_identity_set+urn%3Aglobus%3Aauth%3Ascope%3Atransfer.api.globus.org%3Aall&state=_default&response_type=code&access_type=offline&prompt=login
------------------------------------

Enter the resulting Authorization Code here:
-
If you are not already logged into Globus, do so now.
-
Label the connection if desired, then click Allow to grant Globus the permissions outlined on the screen.

-
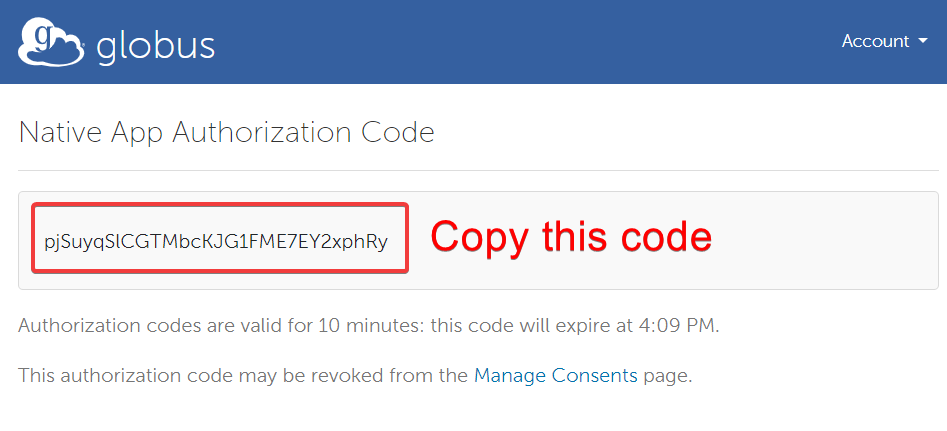
Copy the Authorization Code and paste it into the prompt in your terminal.
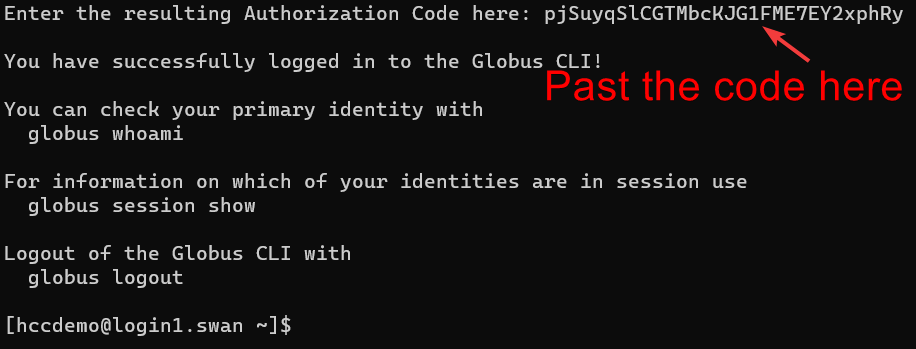
Enter the resulting Authorization Code here: pjSuyqSlCGTMbcKJG1FME7EY2xphRy

You have successfully logged in to the Globus CLI!

You can check your primary identity with
  globus whoami

For information on which of your identities are in session use
  globus session show

Logout of the Globus CLI with
  globus logout

[hccdemo@login1.swan ~]$
-
At this point, you can verify you are logged in:
bashglobus whoamiIf you have logged in, you will see your email address displayed. If not, the message No login information available will be displayed.
-
To terminate your Globus connection:
globus logout
Activating a Globus Endpoint
To find available endpoints:
globus endpoint search search_term
Where search_term is replaced with the keyword you wish to search for. For example:
globus endpoint search hcc
will display any endpoint with "hcc" in it's Display Name.

[hccdemo@login1.swan ~]$ globus endpoint search hcc
ID                                   | Owner                | Display Name
------------------------------------ | -------------------- | -------------
0be99912-af0b-11e9-ab54-0ec3f53aeb0e | hcc@globusid.org     | DMAC
febba5f6-8d53-11e9-8e6a-029d279f7e24 | hcc@globusid.org     | hcc#rhino
bf57b3a0-ba0f-11ec-ad98-5ddcb36bd5b8 | hcc@globusid.org     | hcc#swan
bafbb668-6d04-11e5-ba46-22000b92c6ec | hcc@globusid.org     | hcc#crane
891dfefc-e4a0-11e5-9798-22000b9da45e | hcc@globusid.org     | hcc#attic
To use the endpoint, you can refer it it by it's UUID number. To
activate an endpoint, use the command globus endpoint activate --web:

[hccdemo@login1.swan ~]$ globus endpoint activate --web bf57b3a0-ba0f-11ec-ad98-5ddcb36bd5b8
Web activation url: https://app.globus.org/file-manager?origin_id=bf57b3a0-ba0f-11ec-ad98-5ddcb36bd5b8
[hccdemo@login1.swan ~]$
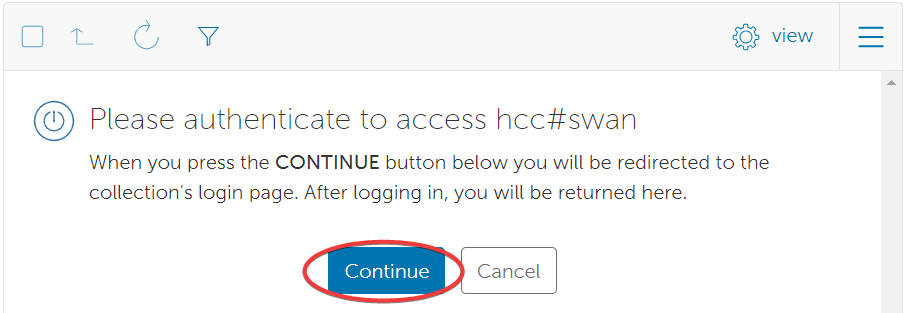
Copy the given URL and paste it into the address bar of your web
browser. If you are not already logged into the Globus website, you will
be prompted to do so. Once you are logged in, you need to click the
Activate Now button to activate the endpoint.
Once an endpoint is activated, it will remain activate for 7 days. You can now transfer and manipulate files on the remote endpoint.
Note
To make it easier to use, we recommend saving the UUID number as a bash
variable to make the commands easier to use. For example, we will
continue to use the above endpoint (Swan) by assigning its UUID code
to the variable swan as follows:
[hccdemo@login1.swan ~]$ swan=bf57b3a0-ba0f-11ec-ad98-5ddcb36bd5b8

This command must be repeated upon each new login or terminal session
unless you save these in your environmental variables. If you do not
wish to do this step, you can proceed by placing the correct UUID in
place of whenever you see $swan.
Endpoint Manipulation
Globus CLI supports the commands mkdir, rename, and ls. All
globus commands follow the format globus <command>
<endpoint>:<file_path>. We can list the files on the
remote endpoint with the command globus ls. To list the files in the
home directory on the remote endpoint, we would use the following
command:
[hccdemo@login1.swan ~]$ globus ls $swan:~/
command-history/
shell-lesson-data/
shell-lesson-data.zip

To make a directory on the remote endpoint, we would use the globus
mkdir command. For example, to make a folder in the users work
directory on Swan, we would use the following command:
[hccdemo@login1.swan ~]$ globus mkdir $swan:$WORK/test
The directory was created successfully

To rename files on the remote endpoint, we can use the globus rename
command. To rename the test file we just created above, we would use the
command:
[hccdemo@login.swan ~]$ globus rename $swan:$WORK/test $swan:$WORK/test2
File or directory renamed successfully

Single Item Transfers
All transfers must take place between Globus endpoints. Even if you are
transferring from an endpoint that you are already connected to, that
endpoint must be activated in Globus. Here, we are transferring between
Attic and Swan. We have activated the Swan endpoint and saved its
UUID to the variable $attic as we did for $swan above.
To transfer files, we use the command globus transfer. The format of
this command is globus transfer <endpoint1>:<file_path>
<endpoint2>:<file_path>. For example, here we are
transferring the file testfile.txt from the home directory on Swan
to the home directory on Swan:
[hccdemo@login1.swan ~]$ globus transfer $swan:~/testfile.zip $attic:~/testfile.zip
Message: The transfer has been accepted and a task has been created and queued for execution

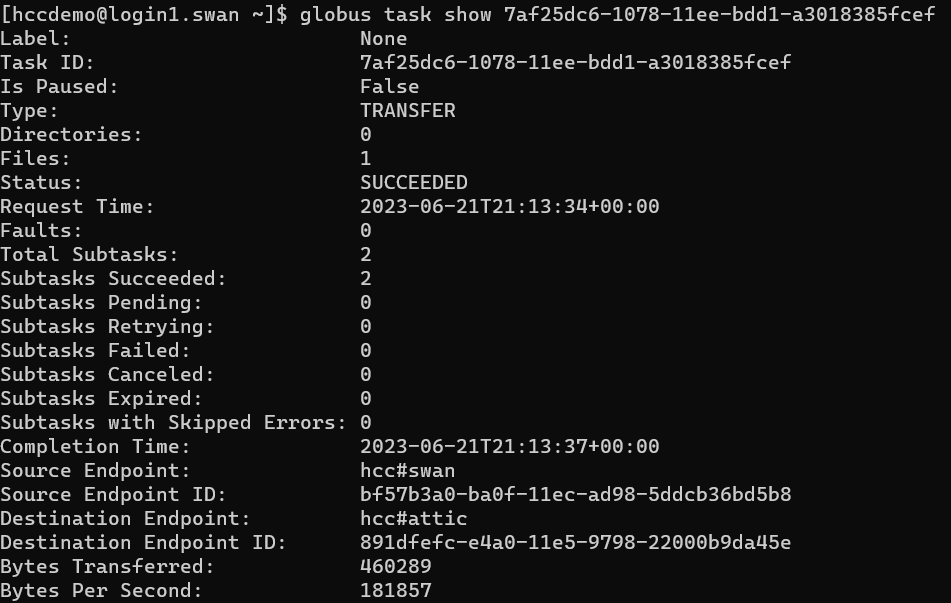
You can then check the status of a transfer, or delete it all together, using the given Task ID:
[hccdemo@login1.swan ~]$ globus task show 7af25dc6-1078-11ee-bdd1-a3018385fcef
Label:                        None
Task ID:                      7af25dc6-1078-11ee-bdd1-a3018385fcef
Is Paused:                    False
Type:                         TRANSFER
Directories:                  0
Files:                        1
Status:                       SUCCEEDED
Request Time:                 2023-06-21T21:13:34+00:00
Faults:                       0
Total Subtasks:               2
Subtasks Succeeded:           2
Subtasks Pending:             0
Subtasks Retrying:            0
Subtasks Failed:              0
Subtasks Canceled:            0
Subtasks Expired:             0
Subtasks with Skipped Errors: 0
Completion Time:              2023-06-21T21:13:37+00:00
Source Endpoint:              hcc#swan
Source Endpoint ID:            bf57b3a0-ba0f-11ec-ad98-5ddcb36bd5b8
Destination Endpoint:         hcc#attic
Destination Endpoint ID:      891dfefc-e4a0-11e5-9798-22000b9da45e
Bytes Transferred:            460289
Bytes Per Second:             181857
To transfer entire directories, simply specify a directory in the file
path as opposed to an individual file. Below, we are transferring the
output directory from the home directory on Swan to the home
directory on Swan:
[hccdemo@login1.swan ~]$ globus transfer $swan:~/output $attic:~/output
Message: The transfer has been accepted and a task has been created and queued for execution
Task ID: bf597710-1078-11ee-a956-63e0d97254cd

For additional details and information on other features of the Globus CLI, visit Command Line Interface (CLI) Examples in the Globus documentation.
Disabling email notifications
By default, Globus will send an email notification for every successful transfer. For large numbers of transfers, this may become overwhelming. Use the CLI, these notifications can be disabled entirely, or only sent for specific conditions (i.e. failed transfers only). To disable all notifications, run
globus transfer --notify off