Using Rclone with UNL's OneDrive
Rclone is an open source file transfer tool to make transfering files to and from various cloud resources such as Box, Amazon S3, Microsoft OneDrive, and Google Cloud Storage and your local machine a simpler task. Guides on how to set up a variety of resources to transfer to and from can be found at rclone's webpage.
This tool can be used to transfer files between HCC clusters and outside cloud providers, such as OneDrive.
Setup RClone
-
You must be able to access your NU Office365 account before beginning this process. Contact your local campus IT support if you need help with initial account setup.
-
Open a browser on your local machine and navigate to the On-Demand portal for the cluster of your choice. We use Swan for this example: https://swan-ood.unl.edu.
SelectDesktopunderInteractive Appsin the menu at the top of the page to get a virtual desktop on the cluster.
Scroll down to the bottom of the next page, and click on the blue
Launchbutton. When the resource is ready, click on the blueLaunch Desktopbutton that appears on the next page.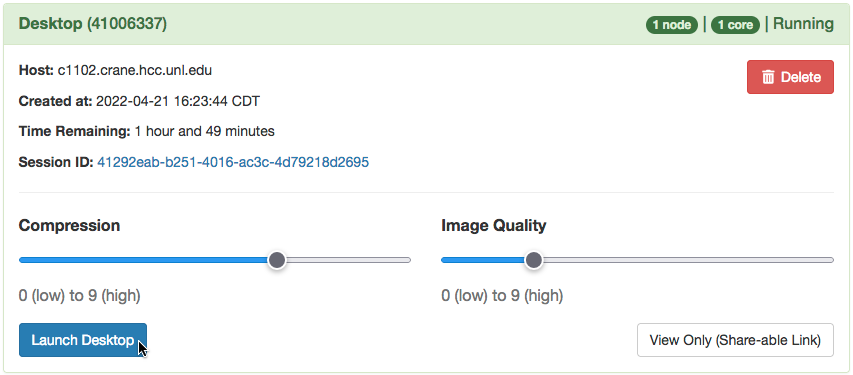
On the virtual desktop, click on the
Terminal Emulatoricon at the bottom of the window to open up a command shell.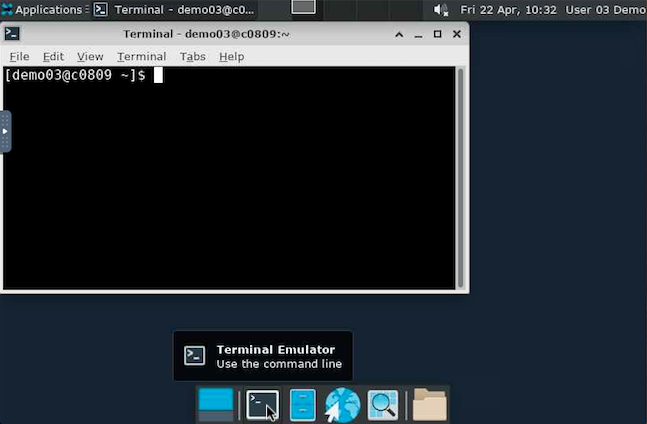
-
At the command prompt in the shell that opens, load the
rclonemodule by entering the command below at the prompt:Load the Rclone module
[demo03@c0809.swan ~]$ module load rclone -
We will need to start the basic configuration for OneDrive. To do this run
rclone config:Load the rclone config
[demo03@c0809 ~]$ rclone config -
In a new configuration, you will see no remotes found. Enter
nto make a new remote and name it a name you will know. In our example, we will use "myOneDrive". SelectMicrosoft OneDriveby entering in the corresponding number, in our case32. Hit Enter for the client_id, client_secret, and Edit advanced config. When you are prompted for auto config, selectn. The terminal will stop at aresult>prompt. Proceed to the next step.Configure OneDrive
[demo03@c0809 ~]$ rclone config No remotes found - make a new one n) New remote s) Set configuration password q) Quit config n/s/q> n name> myOneDrive Type of storage to configure. Enter a string value. Press Enter for the default (""). Choose a number from below, or type in your own value 32 / Microsoft OneDrive \ "onedrive" Storage> 32 ** See help for onedrive backend at: https://rclone.org/onedrive/ ** Microsoft App Client Id Leave blank normally. Enter a string value. Press Enter for the default (""). client_id> Microsoft App Client Secret Leave blank normally. Enter a string value. Press Enter for the default (""). client_secret> Edit advanced config? (y/n) y) Yes n) No (default) y/n> Remote config Use auto config? * Say Y if not sure * Say N if you are working on a remote or headless machine y) Yes (default) n) No y/n> n For this to work, you will need rclone available on a machine that has a web browser available. Execute the following on your machine (same rclone version recommended) : rclone authorize "onedrive" Then paste the result below: result> -
Now open up another terminal window on the virtual desktop by clicking again on the
Terminal Emulatoricon at the bottom of the window.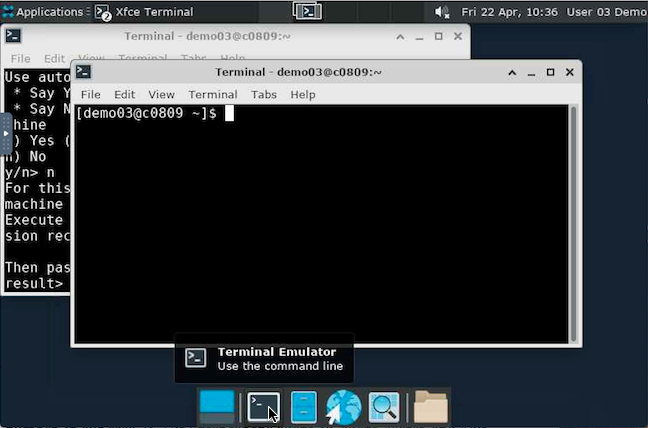
In the new shell that opens, load the
rclonemodule like you did in the first shell withmodule load rclone, and then runrclone authorize "onedrive"at the command prompt. You will be prompted to go to a 127.0.0.1 address in a web browser.Authorize OneDrive from the terminal
[demo03@c0809 ~]$ module load rclone
[demo03@c0809 ~]$ rclone authorize "onedrive"
If your browser doesn't open automatically go to the following link: http://127.0.0.1:53682/auth
Log in and authorize Rclone for access
Waiting for code...
Got code
Paste the following into your remote machine --->
{"access_token":"XXXX","token_type":"bearer","refresh_token":"XXXX","expiry":"XXXX"}
<---End paste
Right-click on the link and select
open linkfrom the menu. A browser window will open on the virtual desktop. On the Microsoft Office sign-in page that opens enter in your NU e-mail address and click "Next". You will be taken to your campus' single sign-on page where you can sign in using your TrueYou/campus credentials. If login is successful, you should be redirected to a page that says "Success!"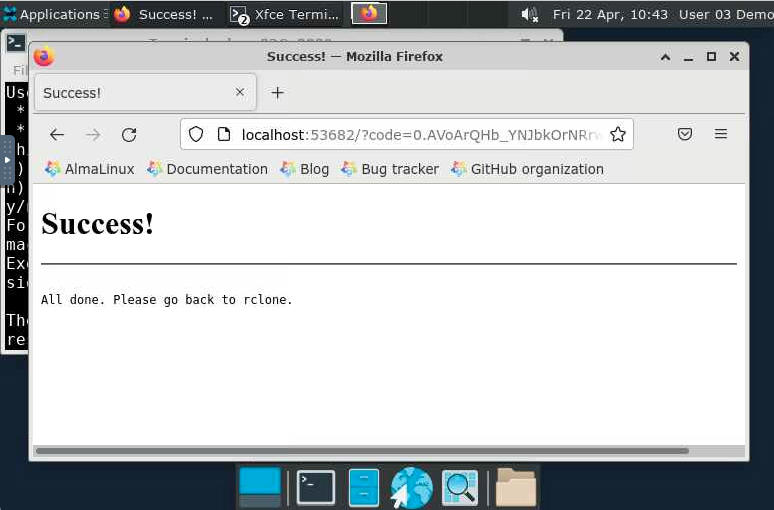
Return to the terminal window where you ran the authorize command. You should see a message instructing you to paste a line of code into your "remote machine" which is the first terminal you opened to run
rclone config.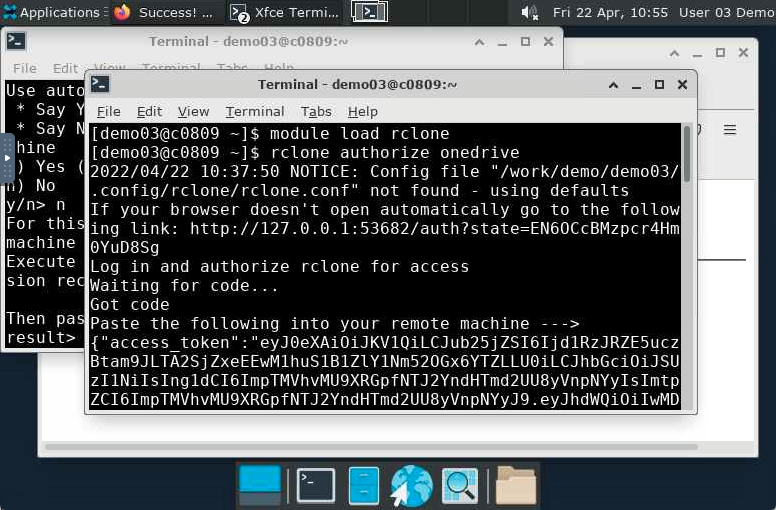
Copy the text by highlighting it, right-clicking, and selecting
copy. Then, return to the first terminal with the waitingresultprompt and paste the text by right-clicking and selectingpaste, then pressenter. Next, select option 1 forOneDrive Personal or Businessand then 1 forOneDrive (business). Pressyat the next two prompts to confirm andqto exit.Authorize OnDemand on cluster
result> {"access_token":"XXXX","token_type":"bearer","refresh_token":"XXXX","expiry":"XXXX"}
Choose a number from below, or type in an existing value
1 / OneDrive Personal or Business
\ "onedrive"
2 / Root Sharepoint site
\ "sharepoint"
3 / Type in driveID
\ "driveid"
4 / Type in SiteID
\ "siteid"
5 / Search a Sharepoint site
\ "search"
Your choice> 1
Found 1 drives, please select the one you want to use:
1: OneDrive (business) id=b!laCd4ZJ54U-[...]
Chose drive to use:> 1
Found drive 'root' of type 'business', URL: https://uofnelincoln-my.sharepoint.com/personal/demo_unl_edu/Documents
Is that okay?
y) Yes (default)
n) No
y/n> y
--------------------
[myOneDrive]
type = onedrive
token = {"access_token": ...}
drive_id = b!laCd4ZJ54U-[...]
drive_type = business
--------------------
y) Yes this is OK (default)
e) Edit this remote
d) Delete this remote
y/e/d> y
Current remotes:

Name                 Type
====                 ====
myOneDrive           onedrive

e) Edit existing remote
n) New remote
d) Delete remote
r) Rename remote
c) Copy remote
s) Set configuration password
q) Quit config
e/n/d/r/c/s/q> q
Now test the connection by running the
lscommand. You should see a listing of your OneDrive files.List contents of OneDrive
[demo03@c0809 ~]$ rclone ls myOneDrive:/ -
To upload or download files, use the
rclone copycommand. For example:Transferring files
[demo03@c0809 ~]$ rclone copy myOneDrive:/SomeFile.txt ./ [demo03@c0809 ~]$ rclone copy ./SomeFile.txt myOneDrive:/ -
To download directories, use the
rclone copycommand and use directory names over file. This copies the contents of the folders, so you need to specify a destination folder.Download a directory from OneDrive
[demo03@c0809 ~]$ rclone copy myOneDrive:/my_hcc_dir ./my_hcc_dirTo upload a directory named
my_hcc_dirto OneDrive, userclone copy.Upload a directory to OneDrive
[demo03@c0809 ~]$ rclone copy ./my_hcc_dir myOneDrive:/my_hcc_dir -
Rclone also supports using sync to transfer files, similar to rsync. The syntax is similar to
rclone copy. This would only transfer files that are updated by name, checksum, or time. The example below would sync the files of the local directory to the remote directory on OneDrive.transfer.sh
[demo03@c0809 ~]$ rclone sync ./my_hcc_dir myOneDrive:/my_hcc_dir